When dealing with ctfs and penetration testing Kali Linux has more or less all the tools needed. Should you install it as a dual boot/ primary system or in a virtual machine?
Personally, I feel that having the system on a virtual machine is better. Re-installing the OS is a common occurrence and having it on a virtual machine is a more efficient way of doing it. On top of that for doing Hackthebox boxes its recommended to use a VM, you are exposing your system to a local network of 'hacking' enthusiasts while doing ctfs. Its not recommended to use your base system
Installing Kali Linux on Virtual Box
Step 1:
Click on NEW on the top left of Virtual Box
The following screen opens up
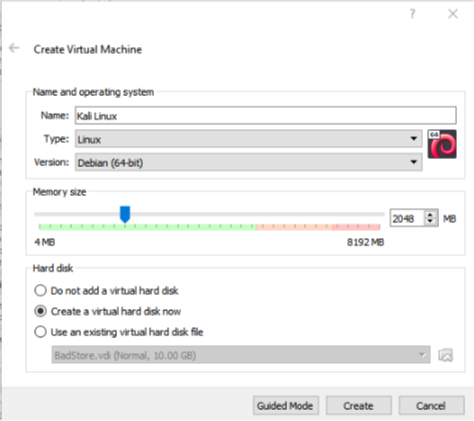
Fill it up as shown
As a general rule I assign 4gb out of 8gb RAM that I have, any lesser and I feel the guest OS to be laggy
The name can vary as you prefer. The type is Linux. Based on the download from https://www.kali.org/downloads/ select either the 32 bit or 64 bit of Debian.
Preferably create a new virtual hard disk.
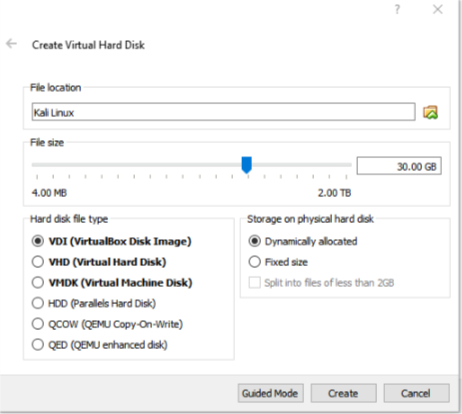
Then select create
The default file size is 8GB, however I have faced errors in installation with only 8GB preferably anything above 30GB works. Click on create.
Step 2:
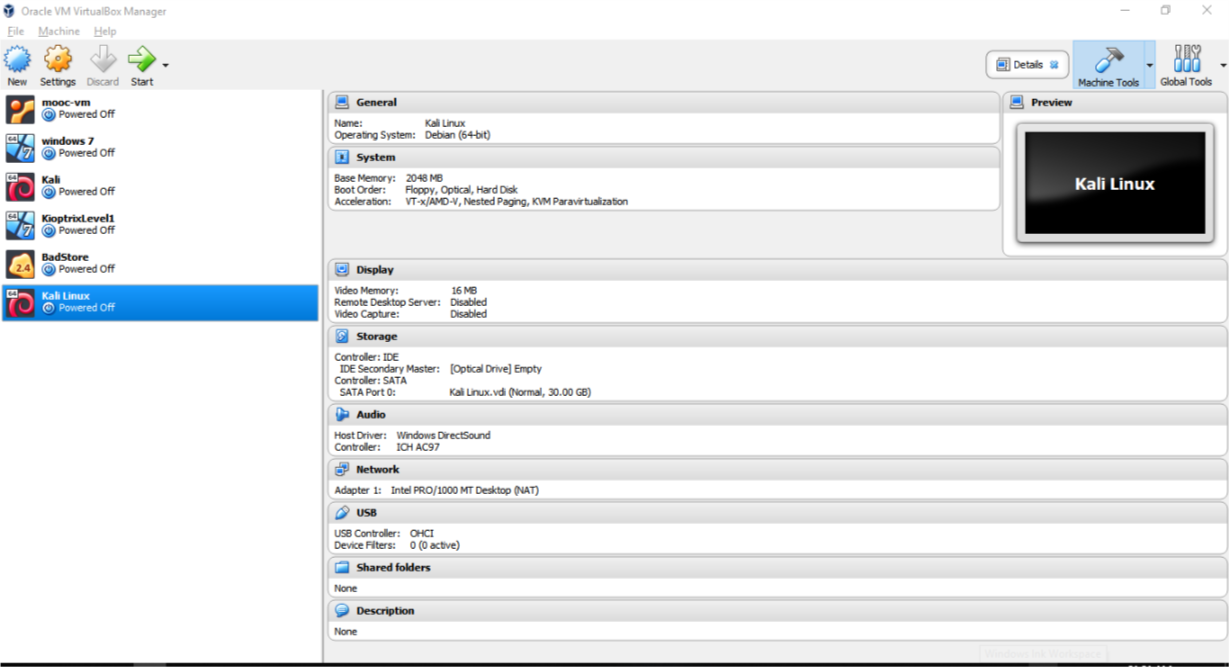
On the left side you should see the name of the virtual machine you just created. Select it and click settings.
Select the Network Portion of the settings

In the network option select Bridged. This gives the Virtual Machine the ability to share the Host OS’s network. In the Virtual Machine it will be a wired connection, irrespective of whether the Host OS is wired or connected.
Next go to Storage and select on the button as follows,
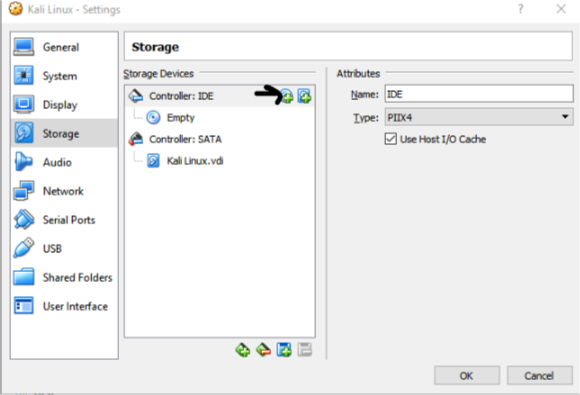
This will open up a window allowing you to select the ISO (image) file for Kali Linux that was downloaded.
Step 3:
Click on Ok and then select the Virtual Machine and Click on Start.
Use your arrows keys and move down to Graphical Install and press Enter.
Select the language of preference and click on Continue.
Select the region of preference and click on Continue.
Select the keyboard and click on continue.
Installation continues.
Select the Hostname can be default as Kali or can be as you choose, click on continue.
Click on Continue leaving the domain field blank.
Select your password and continue.
Partition screen:
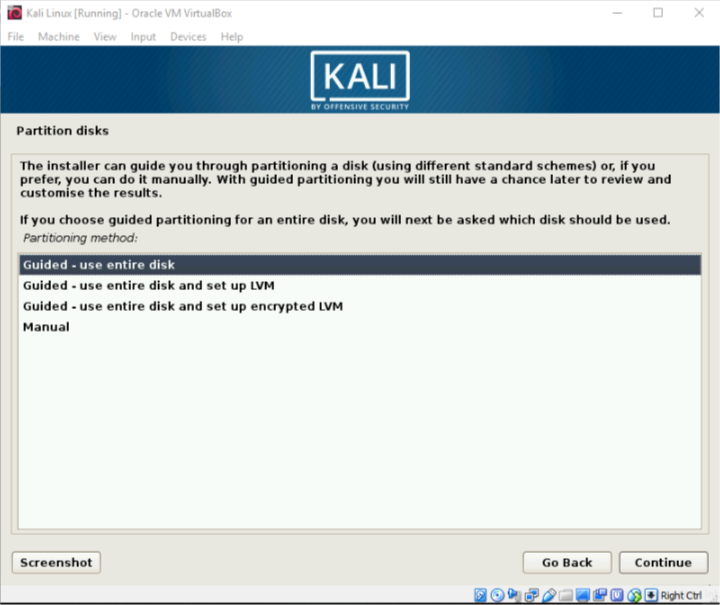
Use the entire disk and click Continue. On the next screen there should only be a single disk. Click on continue again.
Select all files in a single partition and click continue.
Finish partition and write changes to disk and click on continue.
Select yes when prompted and click on continue.
After the installation period(may take 10 minutes), it will ask whether you want to use a network mirror. Select No and continue.
Leave the proxy field blank and continue.
The installation will continue again.
The installation will complete prompting you to restart.
Restart and boot into the system.
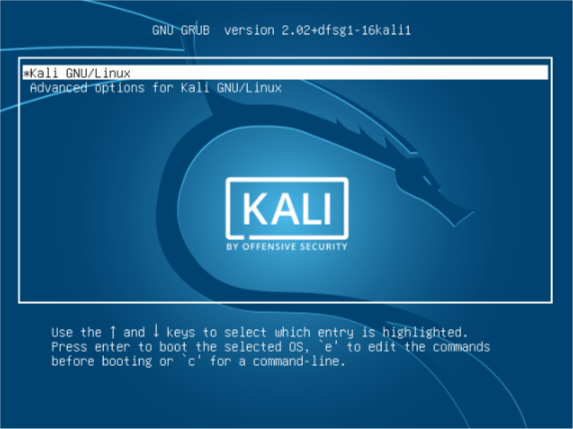
Select Kali and press Enter.
Sign into the system with the Username and Password you had selected.
You have booted into the system. For the following time you need to start the system, Select the name of the Virtual Machine from the virtual box machine and click on Start.
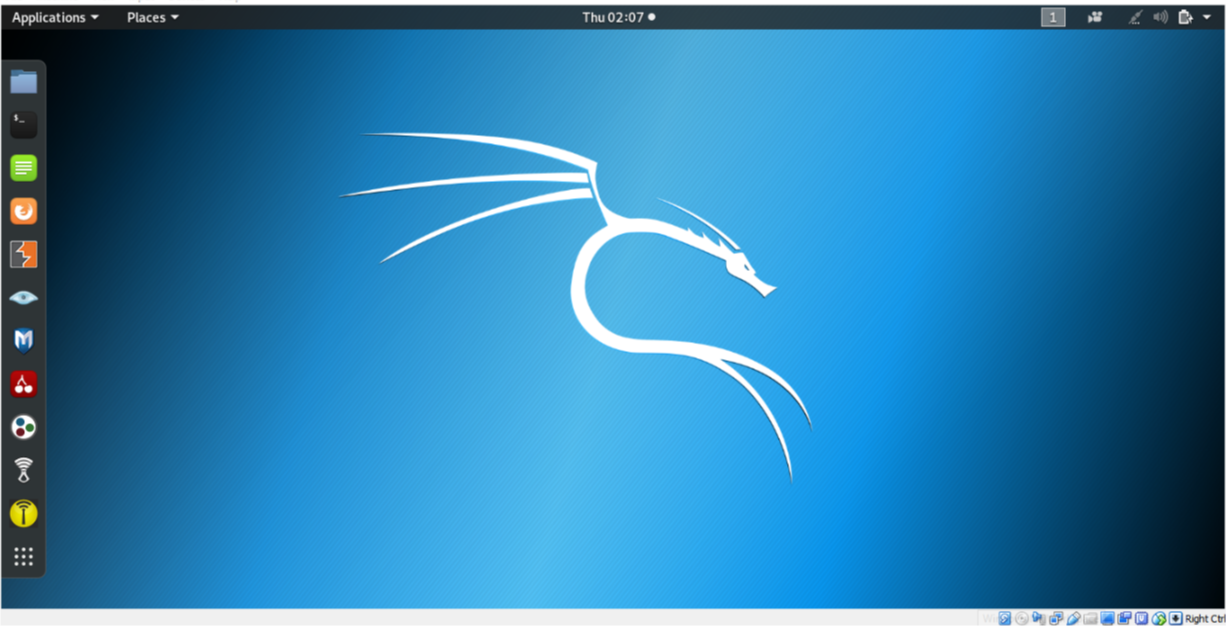
If you download an .ova file the system is already installed, all you need to do is import it and start it in virtualbox.